Monday, December 26, 2016
Bow-Making Made Easy!
Hi guys! I hope everyone had a great Christmas and that Santa brought you everything on your list! For those of us procrastinators who are doing our gift exchange a bit later, here's a great bow making solution that will save you so much time, while keeping your gift wrapping skills impressive.
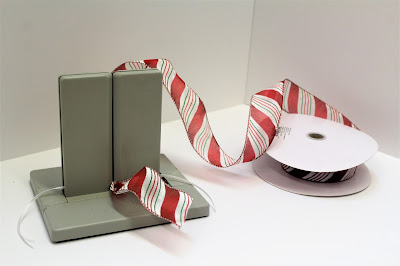
All I did was use the Bow-Dabara and some wired holiday ribbon about an inch wide!
First thing you'll want to do is cut a thin ribbon that will be what you use to tie your bow together. I used 8 inches of very thin white satin ribbon. Insert this piece in-between the two plastic panels that stand up from the Bow-Dabara board.
For this next part, I'll leave my decorative wired ribbon of choice still attached to the spool as I weave it back and forth. The length you weave on each side will determine how big your bow will be. The bigger the loop, the bigger the bow!
When you begin to weave your ribbon, make sure you twist it once before pushing it down to the board. So the motion will look like: out, in, twist, push down. Repeat this technique back and forth on each side of the Bow-Dabara as if you're making infinity symbols. When you have about four or five loops on each side, you're all done!
At this point pull up the skinny ribbon from the board and tie a knot tightly around the mid section of your bow.
So good! All you need to do is fluff the loops and cut the tail! The Bow-Dabara is great in a pinch. A perfect bow every time!
Bethany @Enchanted Lake
Have a Happy New Year everyone!
Labels:
benfranklincrafts,
bfcrafts,
Bowdabara,
bowmaking,
bows,
Christmas,
diy,
giftbag,
giftideas,
gifts,
giftwrapping,
goodiebag,
Holiday,
newyears,
peppermint,
presents,
Santa,
seasonofgiving,
stripes,
winter
Subscribe to:
Post Comments (Atom)


No comments:
Post a Comment